In collaboration with YouTube creator AramK, we bring you a series of Davinci Resolve 16 tutorials to help you get your video project off the ground.
Stabilizing Shaky Video Footage
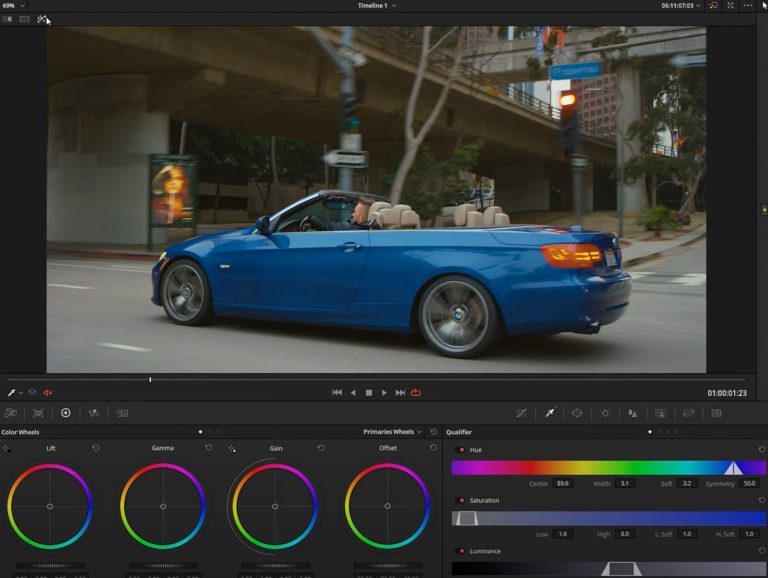
In this tutorial, you will learn how to stabilize shaky video footage in DaVinci Resolve 16 using the Russian Arm Effect. We will be using a shot of a car moving along the highway.
First, we will give the shot a better look by tweaking the camera settings and LUT. This is just to polish the aesthetic before we start stabilizing.
To stabilize the shaky video, we will go into tracking. All the magic happens via tracking. Find your tracking point in the video and click stabilizer. In this video, we go with classic stabilizer and point tracker.
Click the mouse icon and click in the video frame where you desire the tracking point to be. Track backward first and then forward from the middle, leaving all the parameters untouched.
Click stabilize and watch the result. It should look smoother as if it were shot with a higher-end tool like a Russian Arm camera.
At this point, you can color grade the footage to your liking or edit it further.
Watch On YouTube
Hit play on the video below to see AramK show you how to stabilize shaky video footage in DaVinci Resolve.
Looking for a Particular Topic In the Video?
- Begin – 0:14
- Look – 1:13
- Tracking – 1:50
- Stabilizer – 2:00
- Final result – 4:00
Key Takeaways
Stabilizing shaky video footage within DaVinci Resolve 16 is very easy. All you have to do is go to the tracking settings. Set your tracking points in the video frame and then click stabilize. Track backward and then from the middle forward.
You don’t always have to track in the middle. It just depends on how many details you have with whatever you are tracking in DaVinci.
After you save your tracking, you can edit the shot to your liking.
Extra Resources
- Download the latest version of DaVinci Resolve for free
- Download free RawFilm stock footage shot on RED cinema cameras
Thank you for reading and watching! We will see you soon with another DaVinci Resolve tutorial.