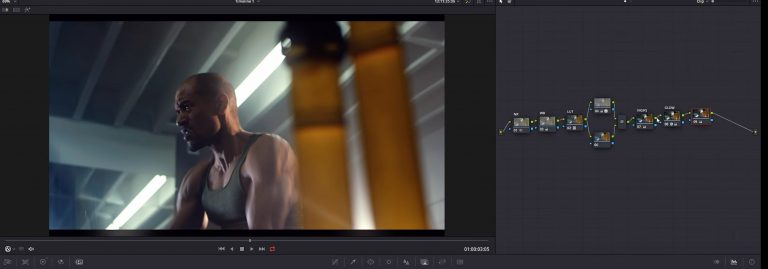
In collaboration with YouTube creator AramK, we bring you a series of Davinci Resolve 16 tutorials to help you get your video project off the ground.
Advanced Color Grading for High-End Commercial Videos
Let’s learn how to produce high-end color grading for commercial videos using advanced techniques in DaVinci Resolve 16. The footage used is a clip of a girl playing the piano.
The first thing we will do is change the camera settings, such as color science to IPP2, color space to REDWideGamutRGB, and gamma curve to Log3G10.
Next, we create a new node and call it contrast. Look at the scopes and adjust contrast until needed. Try not to crush the blacks to keep it looking crisp. One thing to watch for is color reflection. If you have a subject wearing red, yellow, or blue, watch for shadows that reflect that color into the skin tone. This can ruin your color grading.
To prevent the reflection, add a new node and go into hue vs saturation to reduce the saturation of the subject.
Shaping the focus of the shot comes next. We will create a mask and draw our selection. Make sure you have enough “softness” to prevent a harsh line from forming in the image. Also, track it by selecting pan and tilt. Your tracking may differ depending on your commercial video.
Add another node. This one is for a rounded focus along the subject. Track it the same way as the first focus.
We will now change the look of this shot, so create a new node and adjust the footage to your preference. For this commercial-style video, I add a purple feel and adjust RGB individually in monochrome mode.
Watch On YouTube
Hit play on the video below to see AramK show you how to create high-end commercial color grading in DaVinci Resolve 16.
Looking for a Particular Topic In the Video?
- Begin – 0:13
- Contrast – 1:40
- Saturation – 2:37
- Shaping focus – 3:57
- Second focus – 5:10
- Look – 6:35
- RGB – 8:23
- Image scaling – 14:12
- Final result – 14:50
Key Takeaways
Color grading for commercial videos in DaVinci Resolve 16 can be quite advanced, depending on how many techniques you use. There are endless possibilities for achieving the look you want. So, play with the settings.
However, do not crush the blacks when color grading. This can ruin your desired effect. Also, watch for color reflection if a part of the video is heavily saturated in red, yellow, or blue. You can easily fix this by toning down the saturation in the selected areas.
Adjusting the video softness also helps the commercial footage look “blended” and prevents any harsh lines from forming when shaping the focus.
Extra Resources
- Download the latest version of DaVinci Resolve for free
- Download free RawFilm stock footage shot on RED cinema cameras
Thank you for reading and watching! We will see you soon with another DaVinci Resolve tutorial.

