In collaboration with Youtuber AramK, we bring you a series of Davinci Resolve 16 tutorials to help you get your video project off the ground.
Skin tones can be challenging to master in any editing software, not just in DaVinci Resolve. This tutorial will help you create beautiful, natural-looking skin tones- plus a cinematic teal-orange look for everything else.
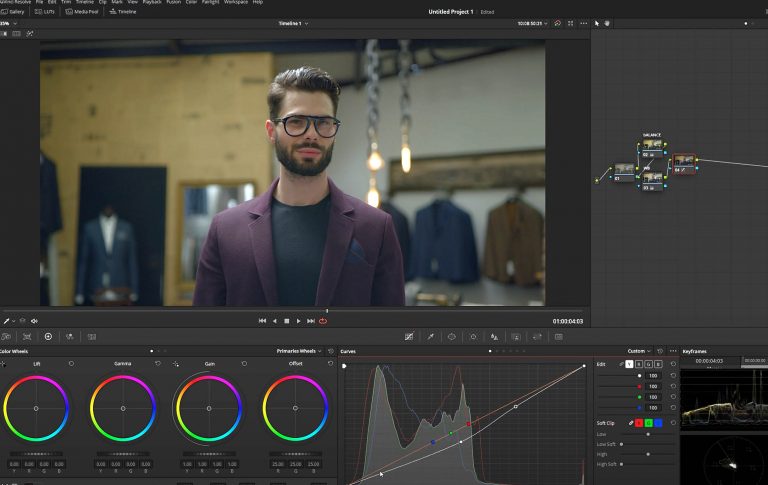
AramK uses a clip of a well-dressed man standing in what seems like a men’s suit retail store. First comes creating a new node labeled as balance. Bump up the highlights and bring down the shadows to create a more dynamic color style. One mistake people make is bringing shadow all the way down; watch for this if you don’t have anything in the shot completely immersed in shadow.
Now we add saturation in a separate node and white balance in another separate node. Edit the white balance by using vector scope. You may notice a strange color tone, so grab offset and move it towards a neutral color section.
Luma is very important here. Pro tip about luma: whenever you bring down just the brightness without affecting saturation, you get a beautiful rich skin tone.
In luma, the secret is- when you use a droplet- if you click on the skin zone, it will automatically pinpoint what the skin tone is on your color curve. Drag the curve to make the skin tone look more natural.
Create a new node and label it as skin so you can qualify the skin tone. The main goal is not to have any noise. When qualifying, take your time to select the skin properly and get as clean a selection as possible.
In a new node called look, this is where the magic editing happens. Start with editing the red channel, specifically focusing on the face. Use the same droplet technique to find a point on the color curve to work with. Bring that down to create a blue-green look.
Convert to layer node, and then connect the skin node to the look node. The skin tone settings should be mixed over into the blue-green color style to create a rich, cinematic color scheme.
In the node key input, dial down the grain on the look node to ensure that the color is not overly drastic. You can do the same on the skin tone node.
If you take a closer look at the man’s shirt, you can see that the black is not pure black; it’s not clean. So, bring down the blue hues on his jacket.
To edit the background, select the wall, switch over to your hue vs. luma settings, and drag the color up for brightness and down for darkness.
Feel free to start color grading on top of those edits (in a new node). Change the temperature to add warmth, create cool tones, and more.
Watch the video below to see how AramK plays with the luminosity and grain to create a finished, perfect skin tone in DaVinci Resolve!
Looking for a particular topic?
- Begin – 0:42
- Create balance node – 1:43
- Editing white balance – 2:48
- Luma – 3:33
- Qualify the skin – 5:40
- Creating the look – 8:20
- Mixing nodes – 9:23
- Cleaning the colors – 11:00
- Editing the background – 12:00
- Luminosity editing – 15:00
- Finished result – 17:53
Key Takeaways
Skin tone is difficult to master initially, but a little practice and attention to detail make the process easier.
Bump up the highlights and bring down the shadows, but don’t take the shadows too low. Next, work on achieving perfect saturation and white balance. Play with the offset color setting to achieve a neutral, natural color scheme.
The secret to perfect skin tone in DaVinci Resolve is luma. Take your time with working on the skin (qualifying, removing noise, adjusting color curve, etc.) as this is very important.
Dial down the grain to make sure the look stays clean and watch for blue hues in black colors. Blacks should stay black for this tutorial.
Any minor changes to the background colors will make a world of difference in your finished product.
Resources
- Download the free version of DaVinci Resolve 16.
- Free RawFilm stock footage shot on RED cinema camera.
Thanks for reading/watching! We will see you soon with another killer DaVinci Resolve tutorial.