In collaboration with Youtuber AramK, we bring you a series of Davinci Resolve 16 tutorials to help you get your video project off the ground.
In this video, the importance of render cache in DaVinci Resolve is revealed. Even with beefy computer hardware and optimal system performance, playing back a clip that has been heavily edited takes a tole on your computer. If you do not get realtime performance, you will have crazy noise that makes your shot look pixelated. What’s worse? You won’t be able to see the noise unless you are in realtime.
A beautiful cinematic shot of a Californian neighborhood is used as the test film here. First, nodes are added and color is changed to give it depth. Watch as the framerate drops from 30 fps to 13 fps after only a little bit of tracking and noise reduction editing. That is no good. However, there is a secret solution to this problem.
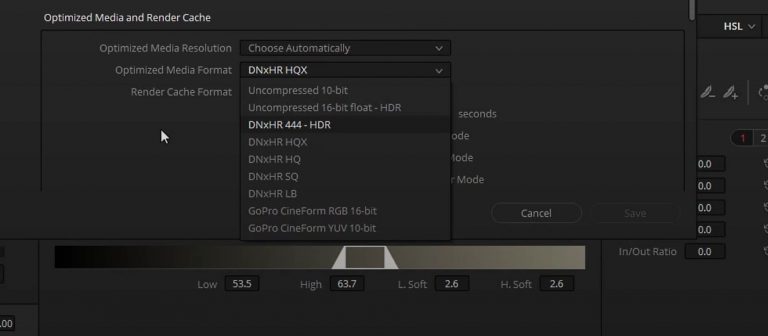
Go into your settings in DaVinci Resolve and look for the section that says “optimize media in render cache.” AramK always recommends your cache drive- a special dedicated drive- to be SSD. Regular HDD just won’t cut it here. HDD is slow, clunky, and not optimal.
Depending on how powerful your computer is, you can change “optimize media format” to another format, such as DNxHR HQX. You may need to lower the format (or raise it) depending on your system. By default, HQX is fantastic for quick speeds.
Another setting to tweak is “enable background caching after x seconds.” This automatically starts calculating data if you don’t touch your computer mouse after however many seconds are set. What AramK recommends is changing that setting to 1 second, so the moment you let go of your mouse, the computer will start calculating.
Once you save those settings, nothing will happen until you enable render caching in your playback settings. You might notice two options for playback render cache: smart and user. The difference here is that, with user, you manually select the clip you’d like to render cache. The smart setting means your computer detects the clips that cannot be played back and those that can.
The whole point of render caching is to make your playback fluid and smooth. Realtime playback lets you see exactly what you are doing and examine the true quality of your work.
Looking for a particular topic?
- Begin – 1:02
- Tracking, editing – 2:03
- Why realtime performance matters – 3:08
- Result is noise – 4:15
- Optimize media in render cache – 4:40
- Changing format – 5:06
- Enable background caching – 6:06
- Save settings & test run – 6:26
- Smart vs. user playback render cache – 6:39
- The whole point of render caching – 8:45
Key Takeaways
Using realtime playback (playing your clip in realtime) will make your DaVinci Resolve editing a much smoother process and will solve unwanted noise that makes your shot look unprofessional.
In order to see realtime playback, you must change your render cache settings and playback settings to enable the process.
Once you’ve finalized your settings per the instructions above, render caching will automatically begin. A red frame will pop up around the clip, indicating it is rendering. The color will turn blue once complete.
Using render cache to enable realtime playback is a must for anyone who wants to create high-quality, pro-grade work.
Resources
- Download the free version of DaVinci Resolve 16.
- Free RawFilm stock footage shot on RED cinema cameras.
Thanks for reading/watching! We will see you soon with another killer DaVinci Resolve tutorial.